Upgrade
-
Open the settings menu and click on Site settings;

-
Under Web Designer Galleries, click on Solutions
You will need to activate the Publishing features to see the solutions link. If you don’t have permissions, ask an Admin to do that for you or to grant you permissions.
If you're migrating from version 2.X.X skip the following step and the next one. (Step 3 and Step 4)
-
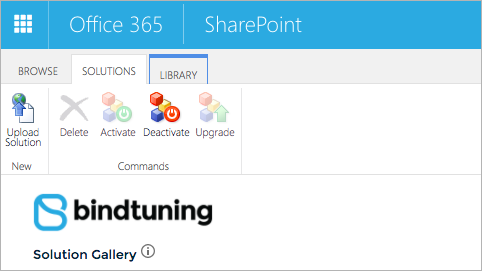
Select the already uploaded Alerts solution and click on Deactivate;
-
Once it has finish deactivating, click on Delete, to delete the Alerts solution from the gallery;
-
On the toolbar, click Upload Solution to select the file BTAlerts_x.x.x.x.wsp included in your web part package;

-
Once it has finished, click on Activate and wait for the page to refresh.
If after the upgrade your web part remains in the same version, follow the steps below: Upgrade a trial to a trial or to a paid version.
Web Part upgraded! ✅
Upgrade a trial to a trial or to a paid version
If after the upgrade your web part remains in the same version, follow these steps instead to fully upgrade.
- First repeat the steps above: Upgrade;
- Open the pages where you have the web part;
- For each web part on the page, add a new web part, right next to the corresponding web part;
- Copy the web part properties from the old web part to the new one you just added to use it on the new web part properties;
- Remove the old web part from the page.